In this post, we'll go through the easiest steps to run the React Native Android apps on mac. You can go directly to each step using the following links:
- Step 1: Build the react native app on Android Studio.
- Step 2: Make your Android emulator ready.
- Step 3: Run your React Native app with "react-native run-android" command.
- The key trick.
This post will explain how to run the "react-native run-android" command on mac in a very few easy steps. Before you continue reading this post please make sure that:
- You have a good understanding to mobile development and react native.
- You have Android Studio installed on your mac. If not, then you can download and install it here.
- You have any Android emulator installed and running on your machine through Android Studio AVD Manager.
- You have Visual Studio Code editor installed (or any other code editor). If not, then download it here.
Once you have all the above software and tools installed and ready, please follow the following steps in the same order.
Step 1: Build the react native app on Android Studio
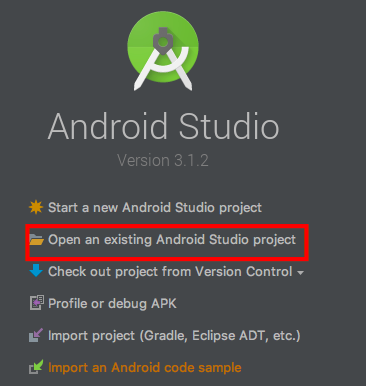
The first step is building the app on Android Studio. No react native commands yet. To do so, open Android Studio, then click "Open an existing Android Studio Project" as shown in the screenshot below:
A popup selection window will open up where you can select an Android Studio project to open. Now navigate to your React Native app project and open the Android folder inside your project directory. Once you open the Android project folder, the Android Studio will sync and build your project automatically or you can do that manually by clicking Build > Rebuild Project from the top menu.
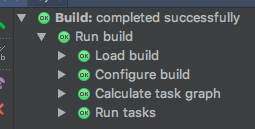
Once your project is built, make sure that no errors or warnings show in your build window and the build result is completely successful with all icons in green as shown in the following snapshot.
Step 2: Make your Android emulator ready
At this step, your project is built successfully on Android Studio and now it's the right time to open your Android emulator right from the Android Studio. To do so, click Tools > AVD Manager. AVD manager will list all the Android device emulators downloaded and installed on your machine as shown in the screenshot below. In this post, Nexus 6 is used. Click the green play button on the right to run your emulator.

Once your virtual device is fired up, you should see something like the following screenshot.
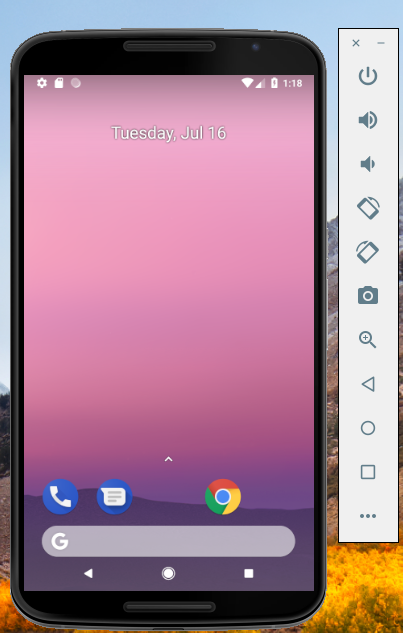
If you have successfully opened your Android device emulator as shown in the screenshot above then it's time to move to the next step.
Step 3: Run your React Native app with "react-native run-android" command
The last and final step is to run your React Native app in the opened Android emulator. To do so, open Visual Studio Code (or your preferred code editor) then click "Open Folder" and open the root directory of your React Native app (not the Android directory). Then, click View > Integrated Terminal to be able to run commands in the integrated terminal inside Visual Studio Code. You can run commands in any external terminal but for the purpose of this post, we are going to use the integrated terminal.
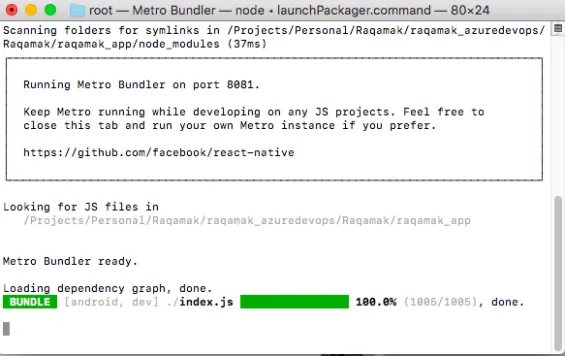
Once the integrated terminal is opened, you can start writing the "react-native run-android" command. This command will start building your app using the installed Gradle compiler shipped with the Android Studio then run the Metro bundler to bundle your app and execute the app on the emulator as shown in the following screenshots.
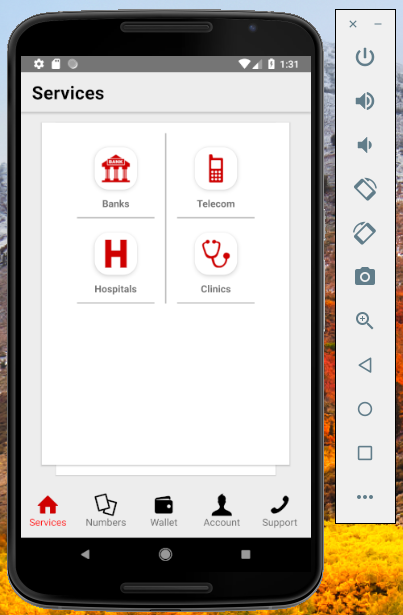
And finally your app will open on the Android emulator as shown below.
The key trick
Running React Native apps on Android is different from running the iOS ones. On iOS, it's even easier by just running "react-native run-ios" on the terminal and that will automatically invoke your default iOS simulator which is not the case on Android. On Android, you have to build your Android project first on Android Studio, then make your emulator ready then running the "react-native run-android" command comes in the last step.
I hope that you have followed the same steps in the same order without any issues and everything went smooth enough. However, if you found any issues in any step, feel free to share your findings in the comments and I will be happy helping.
Read Next
The following articles are related to react native run android on mac in 3 steps.




Very helpful article!
Hello Fady, Brilliant, you gave us really nice information, this blogs shows your great writing skills.Thank you so much that is helpful for a new digital marketer also.