This post will focus on the following topics.
- Step 1 - Delve into the Kendo grid MVC wrappers
- Step 2 - Add required scripts to the the head tag
- Step 3 - Write the server-side grid CRUD (Create, Read, Update and Delete) Ajax operations
- Good news - You're completely done building the Kendo grid MVC wrappers, JavaScript and server-side actions
This post assumes that you have a good experience in the following:
- ASP.NET MVC.
- MVC Razor Wrappers.
- Basic knowledge of Kendo MVC Wrappers.
Now get yourself into the real work to setup your project by following these steps:
- Create a new ASP.NET MVC project.
- Include the required assemblies, JavaScript and CSS files:
- Add a reference to the Kendo.MVC.dll.
- Include the kendo.all.min.js and kendo.all.min.css in your head tag in the layout file.
Step 1 - Delve into the Kendo grid MVC wrappers
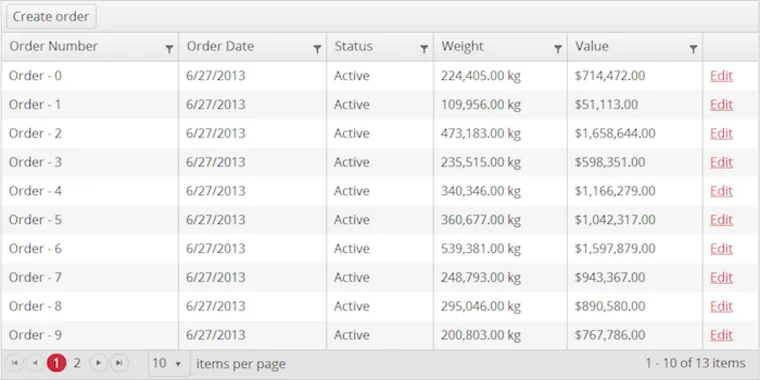
This post is meant to be short enough and to-the-point for the developers who are aiming for creating a Kendo grid with MVC wrappers. The first step will be where you would like to place your Kendo grid which is your MVC razor view. The following MVC code will create a Kendo grid with 4 columns: Icon, Id, Name and Header of a CategoryModel object.
@(Html.Kendo().Grid<CategoryModel>().Name("CategoriesGrid")
.Events(e => { e.DataBound("CategoriesGrid_DataBound"); })
.Pageable()
.Filterable()
.Sortable()
.Columns(columns =>
{
columns.Bound(category => category.Icon).Title("Icon");
columns.Bound(category => category.Id).Title("ID");
columns.Bound(category => category.Name).Title("Name");
columns.Bound(category => category.Header).Title("Header");
columns.Command(commands =>
{
commands.Edit();
commands.Destroy();
});
})
.ToolBar(toolbar => toolbar.Create().Text("Add Category"))
.DataSource(data => data.Ajax().PageSize(20)
.Model(m =>
{
m.Id(model => model.Id);
m.Field(model => model.Id).Editable(false);
})
.Read(read => read.Action("ReadAll", "CategoriesAjax").Type(HttpVerbs.Get))
.Destroy(destroy => destroy.Action("DeleteCategory", "CategoriesAjax"))
.Create(create => create.Action("CreateCategory", "CategoriesAjax"))
.Update(update => update.Action("UpdateCategory", "CategoriesAjax"))
.Events(e =>
{
e.Error("CategoriesGrid_Error");
e.RequestEnd("CategoriesGrid_RequestEnd");
}))
)
The CategoryModel object should be something like that:
public class CategoryModel
{
public int Id { get; set; }
public string Name { get; set; }
public string Slug { get; set; }
public string Icon { get; set; }
public string Header { get; set; }
}
I will explain everything later in this post. For now, lets complete the required script setup to have the Kendo grid working.
Step 2 - Add required scripts to the the head tag
Next step is to add the following scripts to the head tag of your MVC web page:
<script type="text/javascript"> function CategoriesGrid_DataBound() { $('#CategoriesGrid script').appendTo(document.body); }
 function CategoriesGrid_Error(e) { alert('An unexpected error has occurred. Please try again later.'); }
 function CategoriesGrid_RequestEnd(e) { if (e.type != "read") { refreshCategories(); } }
 function refreshCategories() { var categoriesGrid = $("#CategoriesGrid").data("kendoGrid"); categoriesGrid.dataSource.read(); categoriesGrid.refresh(); } </script>
Notice that the JavaScript functions created so far must match the ones written in the Events part of the Kendo grid MVC razor code above. Typically they are e.Error("CategoriesGrid_Error"); which fires when an error occurs performing any operation and e.RequestEnd("CategoriesGrid_RequestEnd"); which fires on every request end and we used it to refresh the grid using a read operation to make sure that an update is successfully done. Also that's why we used an if-statement to avoid refreshing the grid at the end of a read operation to avoid infinite loops.
Step 3 - Write the server-side grid CRUD (Create, Read, Update and Delete) Ajax operations
Now it's time to write the 4 basic Ajax operations required by the Kendo grid to fully operate creating, reading, updating and deleting records from your database. This post will not dig into how you perform the DB operations as it's basically up to you, rather than that, it will illustrate the Ajax action prototypes needed for every operation.
The read operation
public virtual JsonResult ReadAll([DataSourceRequest] DataSourceRequest request)
{
List<CategoryModel> allCategories = CategoryApi.GetAllCategories();
DataSourceResult result = allCategories.ToDataSourceResult(request);
return Json(result, JsonRequestBehavior.AllowGet);
}
Replace the method CategoryApi.GetAllCategories() by your own code that will basically return a list of CategoryModel objects. Notice that the action returns the result in a JSON format and it allows a get operation which is not the case with the create, update and delete operations.
The create operation
[HttpPost]
public virtual JsonResult CreateCategory(CategoryModel model)
{
int categoryId = CategoryApi.CreateCategory(model);
return Json(new { CategoryId = categoryId });
}
CategoryApi.CreateCategory(model) will simply add a new record to the database that you should replace with your own code using any approach and the action will just return the new category ID. Of course, you can change that action to return whatever output you'd like it to pass back for you to further process. For example, returning the full CategoryModel object.
The update operation
[HttpPost]
public virtual JsonResult UpdateCategory(CategoryModel model)
{
bool updated = CategoryApi.UpdateCategory(model);
return Json(new { CategoryUpdate = updated });
}
Of course the CategoryApi.UpdateCategory(model) will update the corresponding record in the database.
The delete operation
[HttpPost]
public virtual JsonResult DeleteCategory(CategoryModel category)
{
bool deleted = CategoryApi.DeleteCategory(category);
return Json(new { CategoryDeleted = deleted });
}
Same as all the other previously mentioned operations CategoryApi.DeleteCategory(category) will delete the corresponding record from the database.
Notice that all the CRUD action names must exactly match what was written in the Kendo grid CRUD operations. I copied them over again as a note.
.Read(read => read.Action("ReadAll", "CategoriesAjax").Type(HttpVerbs.Get))
.Destroy(destroy => destroy.Action("DeleteCategory", "CategoriesAjax"))
.Create(create => create.Action("CreateCategory", "CategoriesAjax"))
.Update(update => update.Action("UpdateCategory", "CategoriesAjax"))
Once you have done writing the actions, lets have some explanations fulfilled and questions answered. So how would you pass the model objects from the Kendo grid to the CRUD actions? The answer is, you wouldn't. Model binding just works exactly the same way it works all over the MVC framework. So the simpler answer would be, the modified (created, updated or deleted) model objects would be sent automatically to the CRUD action for further server-side processing.
Good news - You're completely done building the Kendo grid MVC wrappers, JavaScript and server-side actions
Try build and run your code now and see how the Kendo grid works on your web page. I would recommend debugging the CRUD operations while you do so in order to have a better idea about what's going on into the grid operations cycle. There are some more explanation to the Kendo grid configurations used; for example:
- Using
.Pageable(),Sortable()andFilterable(), as their names say, they will make the grid paging, sorting and filtration active respectively. - Using
.ToolBar(toolbar => toolbar.Create().Text("Add Category"))will simply add the "Add Category" button at the top grid toolbar. - Using
.DataSource(data => data.Ajax().PageSize(20)will configure the grid to have 20 items per page when paging. - Using
m.Field(model => model.Id).Editable(false)will configure the grid not to edit the ID column since it represents the unique key identifier of the data.
I hope I made it super-easy and informative enough for you and that you had quite an easy good experience building a fully-working Kendo grid using MVC wrappers and JavaScript. Feel free to leave comments for any questions.
Read Next
The following articles are related to mvc kendo grid with editable columns in 3 steps.


